File Polling in Oracle Integration Cloud (OIC)

Introduction

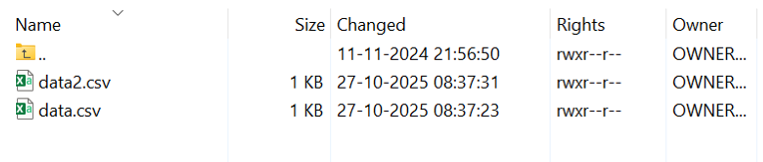
In integration projects, we often exchange data using files such as daily order lists, supplier invoices, or shipment details stored on FTP or SFTP servers.
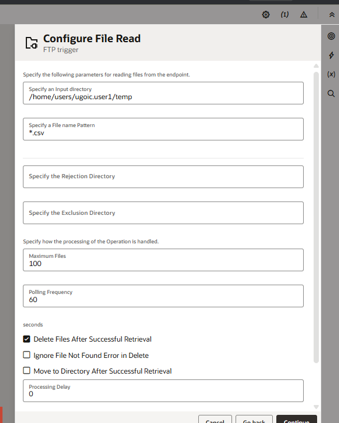
Instead of manually checking for new files, Oracle Integration Cloud (OIC) provides a built-in feature called File Polling.

File Polling lets OIC automatically check a folder (on an FTP/SFTP server or file server) at regular intervals.
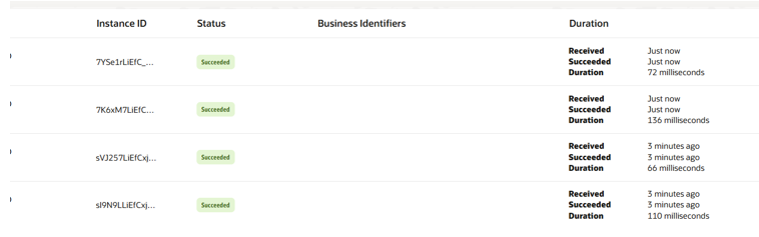
When a new file is detected, OIC automatically reads, processes, and moves or deletes it, depending on your configuration.

This automation is very useful when:

  • You deal with batch files from multiple systems.
  • You want to schedule automatic data transfers.
  • You want to reduce manual monitoring and improve reliability.

Step 1: Create an FTP Connection

Before using file polling, you must create an FTP Adapter connection in OIC.

Steps to create FTP connection:

  1. Navigate to Integrations → Connections → Create.
  2. Search for FTP Adapter and select it.
  3. Provide a name like FTP_Connection.
  4. In the Connection Properties, enter:
    • Host Name → FTP/SFTP server IP or URL
    • Port → Port
    • User Name and Password → credentials for login
    • Optionally, upload private key if key-based authentication is used
  5. Click Test Connection → ensure it shows Success.
  6. Click Save and Close.

Once this connection is created, you can use it as a trigger for file polling in your integrations.

Step 2: Create a New Integration

  1. Go to Integrations → Integrations → Create → App Driven Orchestration.
  2. Enter a name like File_Polling_Integration.
  3. Click Create.

Step 3: Add FTP Adapter as the Trigger

  1. Drag and drop the FTP Adapter into the trigger section.
  2. Select the FTP connection you just created.
  3. Choose Operation → Read File.
  4. Click Next.

Step 4: Configure the FTP Adapter for File Polling

  1. Now configure how OIC should detect and process the files.

    1. Enable File Polling → tick Enable File Polling.
    2. Input Directory: path of the folder where files arrive (e.g., /u01/input/).
    3. File Name Pattern:
      Example: *.csv or Invoice_*.xml
    4. Polling Frequency: how often OIC should check (e.g., every 60 seconds).
    5. Post Processing Action:
      Choose one:
      • Delete File → removes file after processing
      • Move File → moves file to another folder (e.g., /u01/archive/)
      • Keep File → leaves the file in place
    6. Click Next, then Done.

Step 5: Define Schema and Map Data

  1. If your file has a fixed format (like CSV or XML):

    1. Upload a sample file to generate the schema automatically.
    2. Use the Mapper to connect fields from the source file to your target application.

Step 6: Add Stage File Action

  1. The Stage File action stores data temporarily in OIC’s staging area.
    You can use this step to:

    1. Add a Stage File action after the Map.
    2. Choose Operation → Write File.
    3. Define a name like writefileR.
    4. Choose the format (e.g., Text, CSV, XML).
    5. Optionally, specify a directory path (default is OIC’s staging).
    6. Click Done.

Step 7: Add Map Action

  1. After the trigger, you’ll need to map the file data before writing it to the stage.

    1. Add a Map activity right after the FTP trigger.
    2. Map the incoming data from the FTP file to the output element that you have used for the stage file.
    3. Validate mappings to ensure schema matches.

Step 8: Activate and Test Integration

  1. Save and Activate your integration.
  2. Upload a file to your FTP folder.
  3.  

3. Wait for the polling interval.

4. Check OIC Monitoring → Tracking — it should trigger automatically.

5. Verify that your file is read and successfully written to the stage area.

Leave a Comment

Your email address will not be published. Required fields are marked *

Scroll to Top