Create ESS job for BIP Report

Introduction

In Oracle Fusion, BI Publisher (BIP) reports are widely used for generating business-critical outputs. While creating a report is one part of the process, automating its execution using ESS (Enterprise Scheduler Service) is what makes it truly powerful.

Pre-requisites

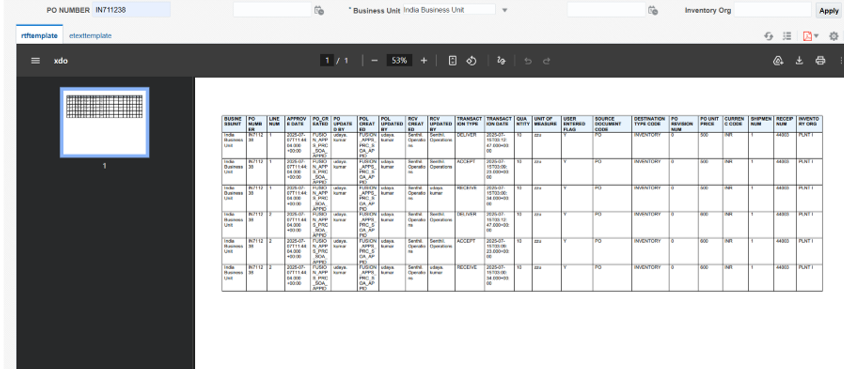
Before proceeding, kindly ensure the report is created successfully. Kindly check the below image.

Note: Make sure that the data model and report both lie in the custom folder of the BI Catalog.

Stepwise: To create an ESS job

Step 1: To create Job Definition

  • Navigation: Navigate to the Fusion home page and open the Setup and Maintenance. On the next page click on Tasks and Search
  • Search Manage Enterprise Scheduler Job Definitions and Job Sets for Financial, Supply Chain Management, and Related Applications. Then after clicking on it, go to Manage Job Definitions
  • Steps:
  1. Click Create (+) icon
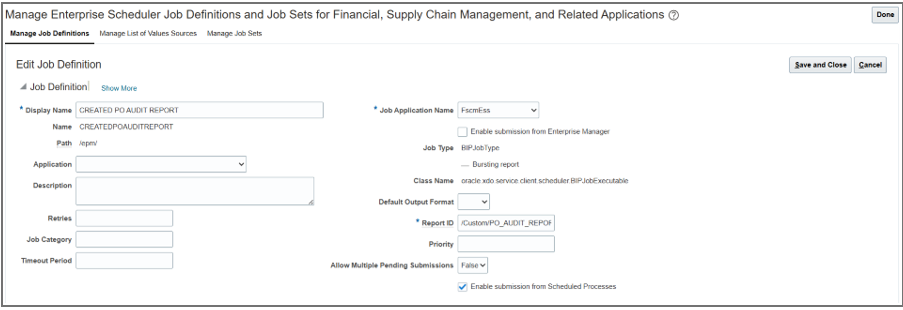
  2. Select: Job Type = BIPJobType
  3. Give the Display Name as {ReportName}, according to your choice.
  4. Give the Name of The Report as {ReportName}, just remove the spaces in between the Display Name that you gave.
  5. Give the value for Path as /epm
  6. Give the value for Job Application Name as FscmEss
  7. Give the value for Report ID as the {Report Path}.

Note: Ensure the report path is correct for Report ID field as per BI Catalog location. Kindly check the image below.

Step 2: Create LOV (if needed for the ESS Job)

Steps:

  • Kindly go to Manage List Of Values Sources
  • Click on Create (+) icon
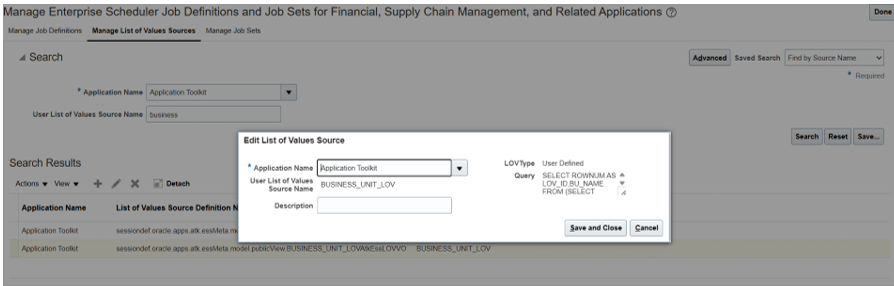
  • Select Application Name as Application Toolkit
  • The LOV name should be the same as defined in the data model
  • Give the value for User List of Values Source Name as BUSINESS_UNIT_LOV
  • Give the value for LOVType as User Defined
  • Give the Query as: SELECT ROWNUM AS LOV_ID, BU_NAME FROM (SELECT DISTINCT BU_NAME FROM FUN_ALL_BUSINESS_UNITS_V)
  • Click on Save and Close. Kindly check the below image.

Step 3: Define Parameters in ESS Job

  • Go back to Manage Job Definitions
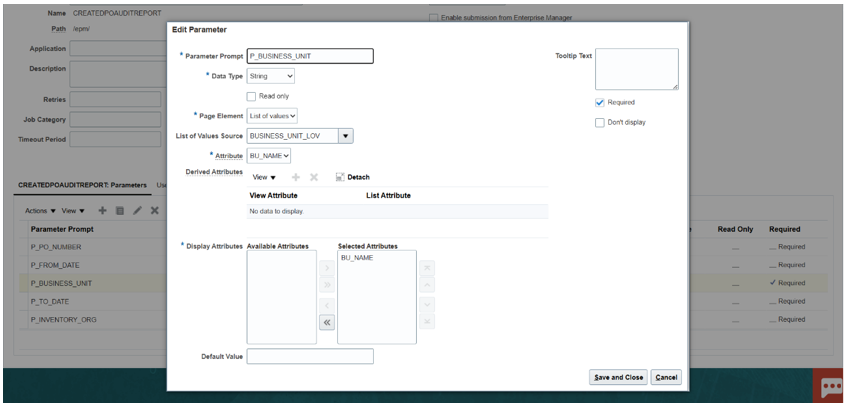
  • In the below option of {ReportName}: Parameters, click Create (+) icon
  • Parameter names must match exactly (case-sensitive) with the parameter names given in the data model
  • Create the parameters in the following way as shown in the image below for P_BUSINESS_UNIT.

Step 4: Save and Validate Job

  • Click Save and Close
  • Go to Manage Job Definitions
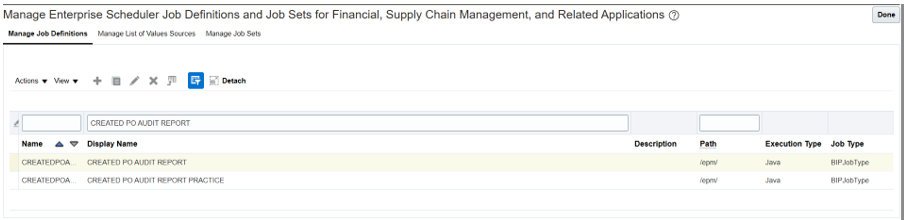
  • Search for the job by {ReportName}
  • Ensure job status is Active. Kindly check the image below.

Step-by-Step: Scheduling ESS Job

Step 1: Run the ESS Job

Navigation: Navigator → Tools → Scheduled Processes

Steps:

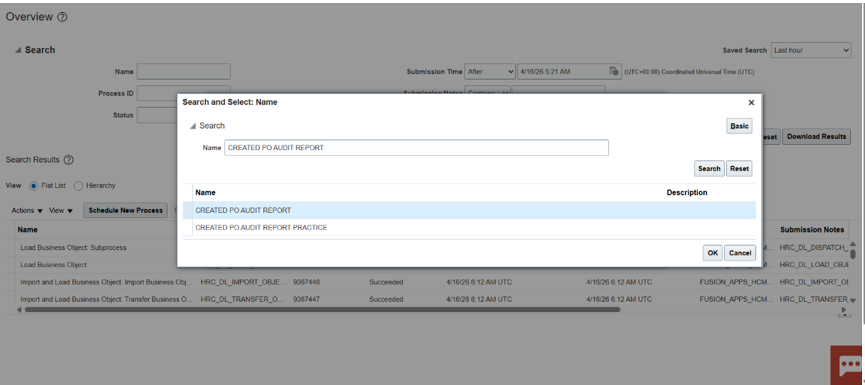
  1. Kindly click on the option of Schedule New Process
  2. Kindly search for {ReportName}
  3. Then Select it and proceed further

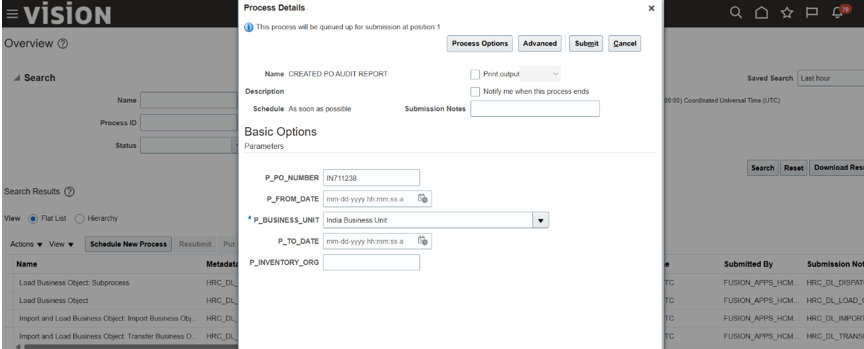
Step 2: Enter Parameter Values

Provide input values such as:

  • PO Number
  • Business Unit (from LOV)

(Tip: Test with minimal filters initially to ensure data is returned. Kindly check the below image).

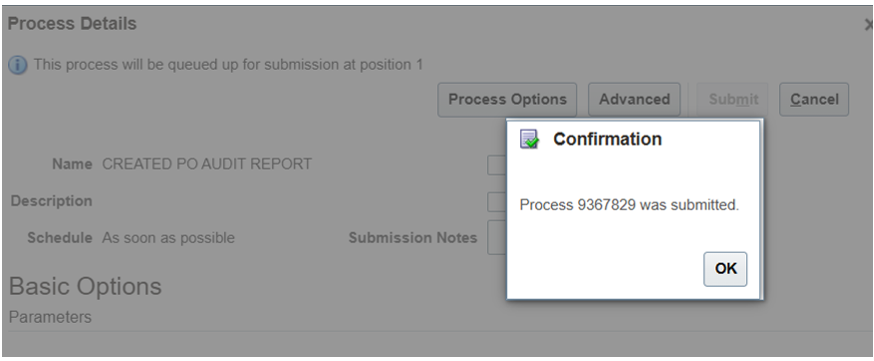
Step 3: Submit Job

  • Click Submit
  • Note the Process ID. Kindly check the below image.

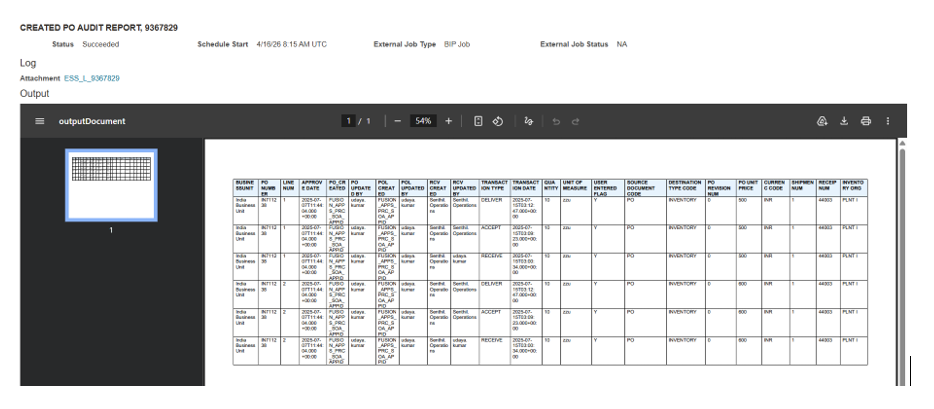
Step 4: Monitor Job Execution

  • Check status → Succeeded
  • Click Output (If configured correctly, the report will generate successfully. Kindly check the below images).

Conclusion

Scheduling BI Publisher reports using ESS Jobs in Oracle Fusion enables automation and efficiency in business reporting. However, success depends heavily on correct parameter mapping, LOV configuration, and proper testing.

So, if you follow the above steps, then you can ensure that your reports run smoothly and also deliver accurate results.

1 thought on “Create ESS job for BIP Report”

Leave a Comment

Your email address will not be published. Required fields are marked *

Scroll to Top